Showing posts with label recipe. Show all posts

Sunday, January 20, 2013

SSFC: Bubble and Squeak


Local potatoes

I love potatoes. Always have since I was a little kid. I eat them in some form or another about 6 days a week, baked being my most favorite way, and fried coming in a close second. If I go out for dinner and have to choose two sides with my entree, I've been known to pick two different kinds of potatoes. In fact, a few years ago I was in Alabama and had one of my most favorite meals ever (also the most memorable BBQ I've ever had): a BBQ chicken sandwich with tater tots, potato salad, and tea so sweet that my teeth actually cried.  


As much as I love potatoes, it can become challenging to think of different ways to eat them. Lately my favorite way is to make bubble and squeak, which I made for this week's SSFC Eat Local challenge. 


Bubble and Squeak ingredients

Bubble and squeak is an English dish made with vegetables leftover from the previous night's dinner. Potatoes are one of the main ingredients, along with cabbage, Brussels sprouts, carrots, peas, or any other leftover veggies. According to Wikipedia, this dish became popular during World War II as an easy way of using leftovers when most food was subject to rationing. The name "bubble and squeak" comes from the sound the vegetables make while they are cooking.

As you can see, I deviated from the traditional list of ingredients for the purposes of the Eat Local challenge. I don't like cabbage, but I thought this might be a good way to use up some Swiss chard I had picked up at the farmers' market. 

Local Ingredients
1 tbsp butter - Pennsylvania
4 medium potatoes - farmers' market
1 cup Swiss chard - farmers' market
1 small onion - my garden
1 clove garlic - my garden

Here's how I made it:
Boil the potatoes until you can spear them with a fork, then drain them in a colander. While they are draining, put the butter and olive oil into a frying pan on medium heat. Dice the onion and  garlic clove and add to the pan. Begin to add the drained potatoes to the pan, stirring and pressing down on them with a spatula so they mash a little. Continue to stir and mash ingredients until the potatoes are fried. Then add the chard. Stir for about a minute until the chard is wilted. Season with salt and pepper to taste.

Bubble and Squeak

Although I made this as a side dish for dinner, we've also had it with breakfast. Bubble and squeak is actually part of a full English breakfast, and it's a nice alternative to the hashbrowns I typically eat with my eggs. 

You can see what other Challenge participants are eating this week by clicking on the SSFC photo above. 

Have you ever eaten traditional Bubble and Squeak? How would you make it?

Tuesday, September 18, 2012

SSFC: Food Preservation

It has been a while since I've posted about the SSFC eating-locally challenge--and yes, it's still going! I'm a couple of days late with this, but last week's challenge was about food preserving and canning. I have never canned anything before, and I don't think I grow enough food to go through the trouble of canning. I like the idea of preserving fresh food for the winter, and we do freeze a lot of food. I have local squash, spinach, and broccoli in the freezer that I haven't got around to using yet. Peppers freeze very easily--we clean them, core and remove the seeds, and then slice or chop them up, put them in a container, and leave them in the freezer. When I'm ready to use my peppers, I often just run them under water to soften them up and then they're ready to chop and add to your dish.

For the food preservation challenge, I decided to try oven roasting some of my tomatoes.

tomatoes for roasting
These are so many recipes online with varying times and oven temperatures, and after sorting through all of them, I decided to follow this one by David Lebovitz. The length of time is hard to gauge because it depends on the size and moisture level of tomatoes. I've read that Roma tomatoes are best because they have a lower water content than others. Unfortunately my pile of tomatoes was of different varieties and sizes, so I loosely followed his recipe, but mainly decided to wing it.

I had one beefsteak tomato, a few Romas, a handful of cherries, and some Pink Brandywine heirlooms from my garden. I waited until we had a cloudy, somewhat cool day so that running the oven for 3 hours wouldn't stifle us to death in the summer heat. Here's what I did:

Oven Roasted Tomatoes
- Preheat oven to 325°F
- Cut the tomatoes in half horizontally, remove the stems, and remove the seeds. I patted dry some of the juicier tomatoes with a paper towel to remove some excess moisture.
- In an 8x8 pyrex baking dish, add about 3 tbsp olive oil, one clove of garlic, 1 tbsp dried oregano, 1 tbsp dried basil (from my garden!), and salt and pepper.*
- Toss tomatoes around in dish so that all sides are coated.
- Place tomatoes cut side down in the dish.
- Bake for 2 1/2 hours or until tomato skin is wrinkly. (Some of my smaller tomatoes were ready after 2 hours).


*Feel free to add your own combination of herbs and seasonings here. I think next time I'm going to use rosemary and thyme, or maybe do one dish with oregano only.


oven roasted tomatoes final
Here's the finished product. They don't look very pretty, but let me tell you, they smelled fantastic! The whole house smelled like olive oil, oregano, and basil, like a pizzeria! I almost hyperventilated from inhaling all that yumminess. I let them cool a little and then put them in a freezer bag. I think they'll be great in soups and sauces later this Fall.

You can read about what other Challenge participants made here. Do you can? What's your go-to method of food preservation?

Friday, July 27, 2012

SSFC Fruit Week--Blueberry Peach Crisp

blueberry peach crumble before
I'm so excited to write this post because this is the first time I've ever baked a dessert with fresh fruit. Our Local Food Challenge was to make a dish with fruit, and I followed this recipe to make a blueberry peach crisp, with a few modifications.

Ingredients:
Filling:
- 4 ripe peaches, peeled and sliced (farmers' market)
- 1 pint blueberries (farmers' market)
- 1/2 lemon zest and juice*
- 2 tsp cornstarch
- 1/4 cup agave nectar*
Topping:
- 1/2 cup wheat flour (King Arthur's [their website has lots of excellent recipes])
- 1/2 cup light brown sugar
- 1/2 cup (half stick) unsalted butter, melted

Directions:
Heat oven to 375°F. Combine all filling ingredients into a bowl, mix to make sure all ingredients are coated with corn starch. Pour filling into non-greased pie pan. Mix remaining ingredients and sprinkle over fruit mixture. Bake for 45 minutes or until top is golden brown.

*The peaches were so ripe and sweet that I think I didn't need the agave nectar. It almost made it too sweet. And I think the lemon was just a bit much too. Maybe I'll do just a squeeze next time? It's just that the fruit was so fresh that these ingredients took a little away from them.

blueberry peach crumble after

The topping shrunk in the oven. I should have added about a 1/2 cup of oats or more flour to make enough topping to truly cover the top. I'll have to remember that for next time. My husband liked the crisp, and since he grew up with grandmothers who made apple and cherry pies with fresh fruit from the trees in their backyards, I'm going to take that as a high compliment! Check out what other SSFC Challenge participants are eating, including this yummy strawberry-lime sorbet.

p.s. I'm so excited for the Olympics to begin! I should probably eat something healthy while watching the games, but I'll probably drink wine or champagne and have popcorn with extra butter. Will you be watching the opening ceremony?

Tuesday, February 21, 2012

Dark Days of Winter: Apple Potato Hash

{apple-potato hash ingredients}


For my Eat Local challenge meals, I've been trying to think of ways to use the 5-pound bag of potatoes and tart apples I bought at the farmers' market a few weeks ago. I found this Rachael Ray recipe for an apple-potato hash. I thought the combination sounded a little odd at first, but then I thought fried potatoes = good. Fried apples = good. Butter = good. Here's my version of the recipe:

Local Apple Potato Hash 
3 small potatoes (via farmers' market)
1 apple (via farmers' market)
1/2 medium onion (via farmers' market)
1 teaspoon butter (Blue Ridge Dairy, VA)
2 teaspoons olive oil (exception to Challenge rules)
salt and pepper to taste (exceptions to Challenge rules)

I pricked the potatoes with a fork and cooked them in the microwave for 4 minutes. While the potatoes were cooking, I added the oil and butter to a pan on medium heat. Then I added the chopped up apples and onions and cooked these in the pan for 5 minutes.

After 5 minutes, I added the potatoes. They were soft from cooking in the microwave but not mushy. I cut the potatoes into cubes and added them to the pan. I seasoned them with salt and pepper to taste and let the whole hash cook for 5 more minutes. At this point the apples were quite brown and potatoes had nice crispy edges. I cut off the heat and served it up.

It tasted a lot better than I thought it would, and the combination of oil, butter, and potatoes made the house smell so good! I made this as a side for dinner, but I think it would work nicely as a breakfast dish too. 

Thursday, December 1, 2011

Dark Days of Winter Week 1: Stuffed Bell Peppers

The Dark Days of Winter Eat Local Challenge begins this week, and I'm very excited and a little nervous to participate. Some of my favorite foods include bananas, cheese, and avocado--and they don't always fit the SOLE (sustainable, organic, local ethical) criteria, especially here in the DC area. But now that I've spent two summers growing my own vegetables and educating myself about where all my food comes from and how it's grown, I thought the time was right to participate in a challenge like this. And my husband has to participate by default! (One SOLE meal a week is not a hardship, right?).

We ate our first Challenge meal the Sunday after Thanksgiving, and this very simple meal of bell peppers stuffed with ground beef was a perfect end to a weekend of holiday indulgence (i.e, excessive amounts of starch and dessert).

Stuffed Bell Peppers
(serves 2)
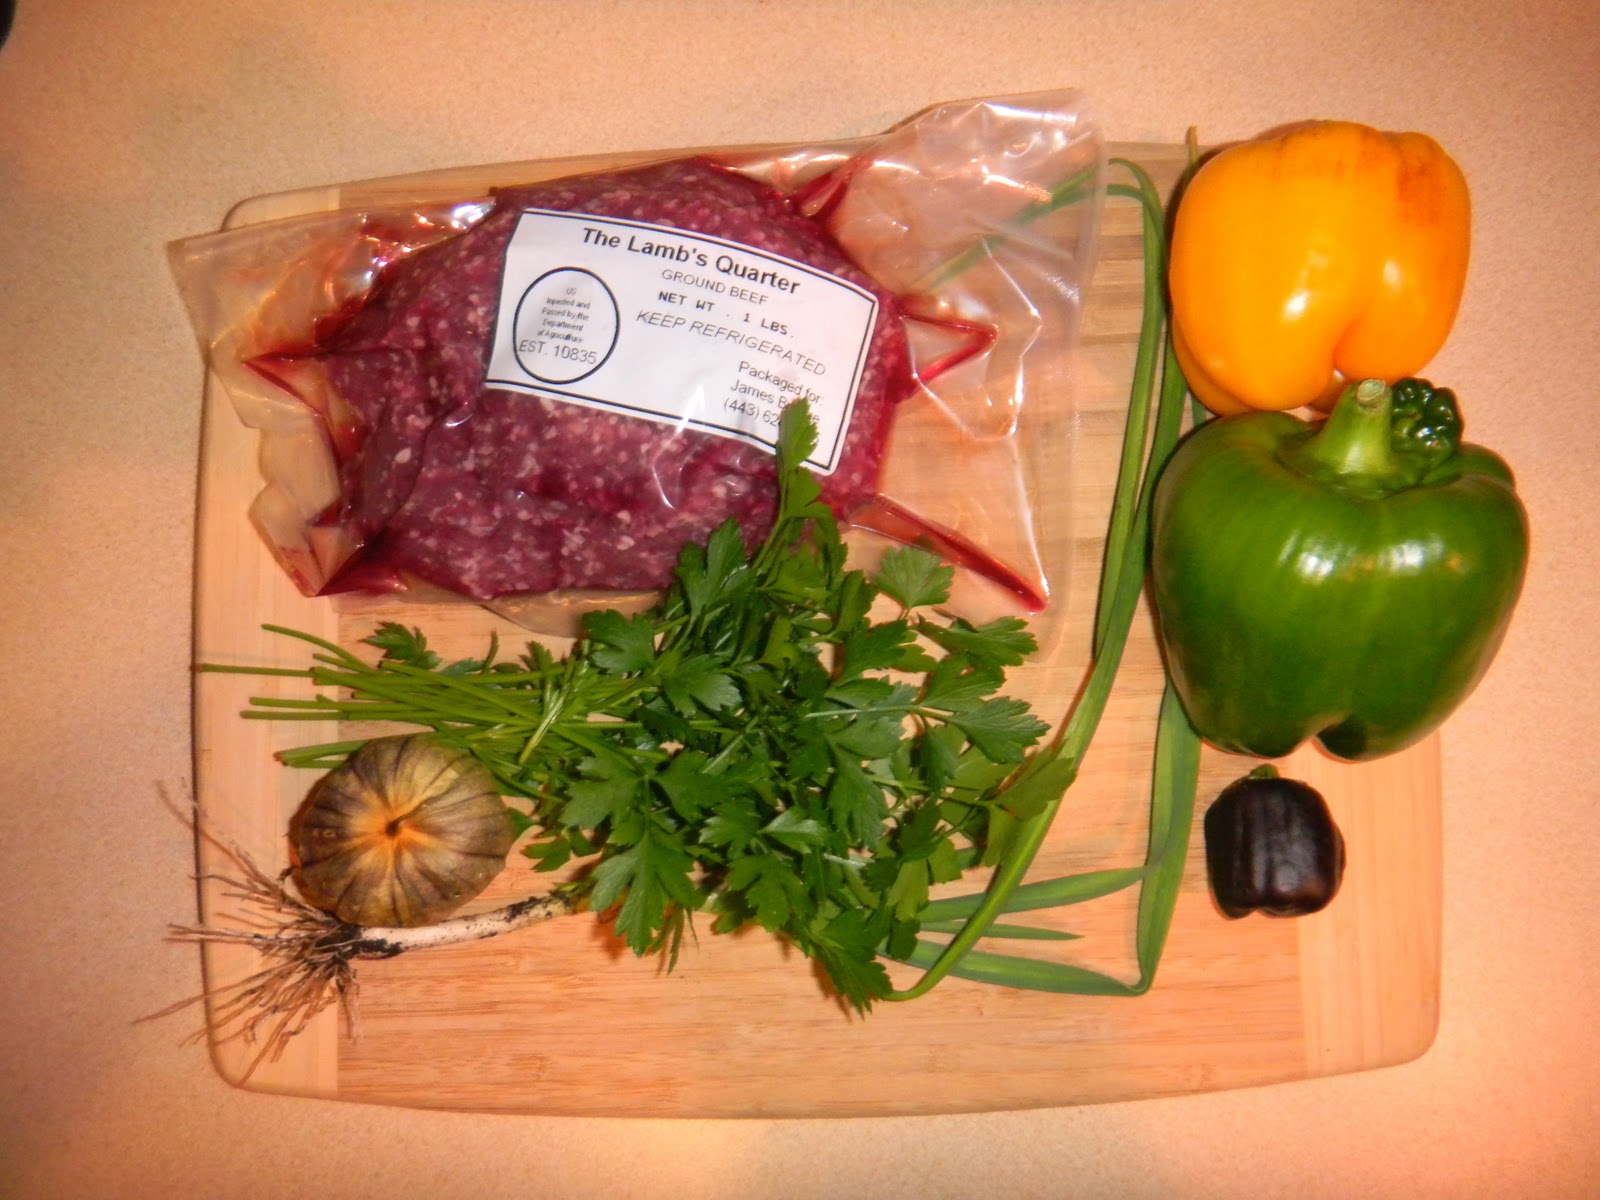
- 1 pound ground beef (grass-fed from The Lamb's Quarter, a family-run farm, via my local farmers' market)
- 2 medium-sized bell peppers--yellow, green (my garden)
- 1 tiny purple pepper (my garden)
- 1 tbsp onion scapes (my garden)
- 2 tbsp parsley (my garden)
- 1 tomatillo (my garden)

{please forgive my photo quality; I'm not great at evening shots}

Preheat oven to 350 degrees. Cut the tops off the medium-sized peppers, clean out the insides, and boil for about 5 minutes to soften them. Once they have softened, removed them from water and place them on a paper towel to dry off.

Meanwhile, place the ground beef into a skillet on medium heat. Chop all remaining vegetables finely. Add the chopped vegetables to the skillet and cook everything together until all meat has browned. This will be used to stuff the peppers. Once ready, place equal amounts of the stuffing mixture into the scooped out peppers. Bake for about 10 minutes. Serve immediately.

Ordinarily I might top these with cheese or serve them with rice. Although I listed rice as one of the exceptions in my orginial post, I didn't want to play that card yet. I don't yet know of any Virginia or Maryland cheeses that I can get, so we didn't include that yet. This meal was perfect as-is!

{Update: At the farmers' market near my office, I found a dairy that makes cheese right on their own farm, which is less than 100 miles away. Score!}

Friday, September 23, 2011

Happy Fall! (and a last taste of Summer)

Today is the official first day of Fall--my favorite season! I'm looking forward to cooler temperatures, wearing cozy sweaters and boots, and eating lots of pie and soup. Temperatures are still a bit warm around these parts, though, so it's hard to get into a complete autumn mindset. While looking at food porn online yesterday, I came across some summer salad recipes that I wish I had found, oh, about 3 months ago.

Tomato Carpaccio - does this scream summer, or what? I don't really have any garden-grown tomatoes left, but next summer I plan to grow some big slicing tomatoes for salads just like this.

Endive and Warm Pear Salad - Well, this salad seems a little high-brow for my simple taste, but it looks delicious. And I confess that I do love pears in salads, and pears and endive seem to be a common combo that works very well. Maybe one day, when I'm a proper lady, I'll have dinner parties where I start the meal off with something classy like this instead of the beer-burger-and-guacamole parties we have now. Maybe.

Avocado and Corn - And speaking of guacamole, I think this avocado and corn salad is my favorite. I love avocados and ate a lot of avocado and tomato salads this summer. I wish I lived in a more tropical zone where I could grow healthy avocado (and citrus) trees.

So farewell Summer! Here's hoping for a happy fall season.

(all food photos via Mark Bittman)

Monday, August 22, 2011

My Kitchen Garden

Before I owned a home, I would watch hours of HGTV, dreaming of the kitchen, bath, and landscaping projects I would do once I became a home-owner. (Now that I am one, I am painfully aware of the time and money that interior and exterior decorating costs). I remember an episode of an early morning garden program that featured a woman going out to her backyard kitchen garden to decide what to eat for dinner. She picked a few herbs, an eggplant, and some other vegetables and put them into a cute little basket. I thought, "That's what I want! I want to go out into my backyard and pick fresh food for my dinner. (And I want a cute basket too.)"

I forgot all about that until one recent weekend afternoon. I was standing in my kitchen, wondering what to eat, when I decided to make an easy chickpea salad using some vegetables I had recently harvested. That's when it dawned on me that my little container garden is developing into a kitchen garden.

It is nothing like what I saw on TV that day, or what I see on websites featuring people's expansive vegetable patches with many different vegetable varieties. My garden is small and still needs a lot of work and organization. We don't have a lot of yard space for gardening, so almost everything is growing in containers, which has positives and negatives. But we grow enough for the two of us to have regular meals with fresh veggies, and we freeze the extras and/or give them to friends. We no longer "just grow" yellow squash, tomatoes, and bell peppers. We're now trying new varieities of these, as well as beans, cucumbers, luffa. Eventually I think we'll be more creative in the kitchen when it comes to meals. I think we've come a long way from the first summer when we didn't know what the heck we were doing and just wanted to grow a few tomatoes and peppers to see if we could do it.

I took a few pictures of recent meals we've had with freshly-picked vegetables. It's nice to have them on hand to throw in a pasta dish for a quick and easy dinner when it's late and you don't feel like cooking anything too complicated. We added steamed broccoli and squash to this pasta, and tossed it with olive oil, pepper, and fresh tomatoes. It was a refreshing meal on a hot summer night. (Glass of wine is often very necessary).

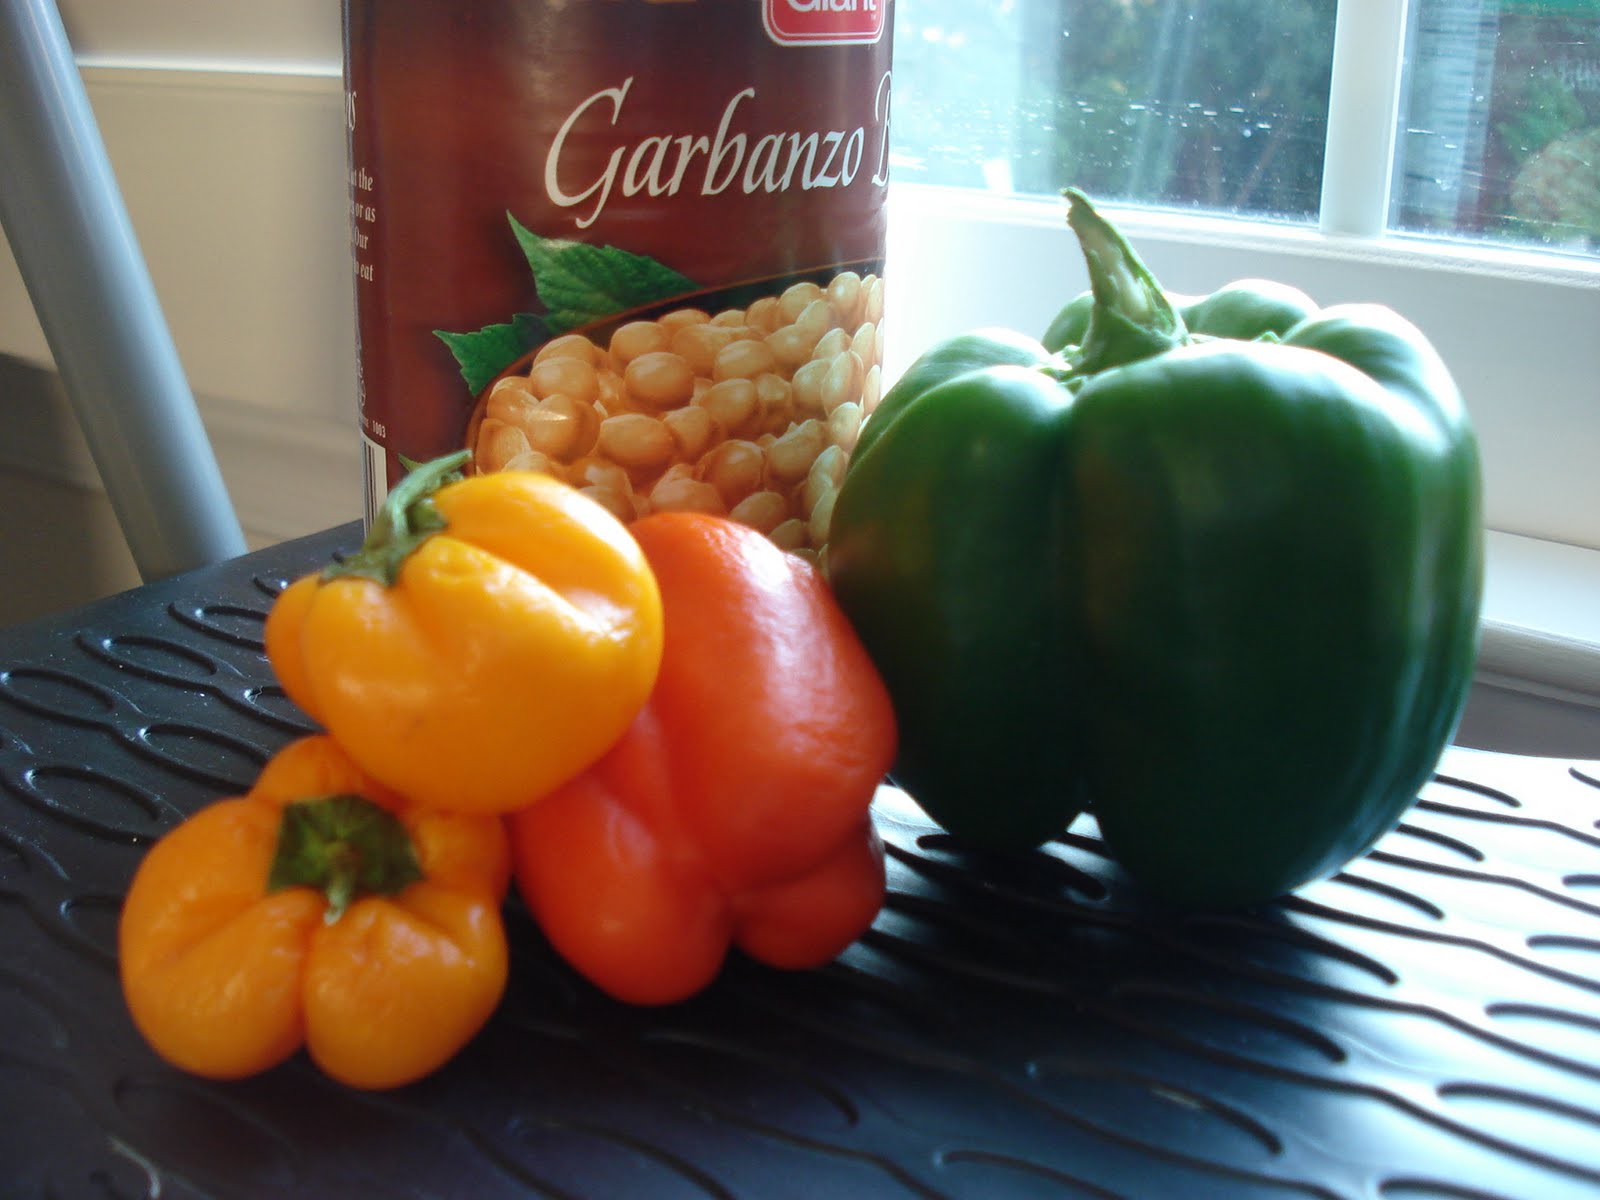
This was my quick and easy chickpea salad: I drained a can of chickpeas and cut up some fresh-picked orange, yellow, and green bell peppers. (Technically that green one didn't get picked. It was knocked off by fierce winds). I picked some parsley and diced up a cup of Tiny Tim tomatoes, tossed everything with olive oil, salt, and pepper, and voila, a super fast cold salad was on my plate.

Although I have a long way to go before I truly consider myself a "gardener," I am really happy with the new skills I'm learning from gardening and preserving food. I don't think we grow enough to can anything, but we do freeze some vegetables and make soups and tons of yummy tomato sauce to freeze too. This year we're learning to save seeds from our favorite and best vegetable plants.

I'm also happy to know exactly where my vegetables are coming from, how they were grown, and the taste...no tomato I've ever bought from the grocery store compares to one picked right off the vine. I hope one day to have a vegetable garden in the ground and not only in containers. I would love to grow potatoes and melons. I'd love to have a little greenhouse so I can have tomatoes all year long. I still need to find a cute basket. In the meantime, I'm very happy to have fresh vegetables right outside my door.

Sunday, May 8, 2011

Recipe: Strawberry Lemonade


strawberry lemonade, originally uploaded by Bumble Lush.
Soggy, brown, and bruised. Doesn't that sound appetizing when you're talking about fruit?? Almost all of the strawberries I bought from the store Friday were mushy, bruised, and bad by Saturday. The pint of strawberries I bought at the farmers' market yesterday still looks great. Yes, I know strawberries that are grown in CA and transported across the country out of season are not going to stay fresh. I have foolishly wasted my money on berries that go bad two days later for the last time. Now that strawberry season is approaching here in northern VA, I plan to buy lots of fresh-picked berries to freeze for use throughout the year.

Meanwhile, I whipped this drink up with what I salvaged from the bruised batch. It made enough for two pint glasses for me and the hubby, but I will play with the recipe to see what will get to a whole pitcher.

Ingredients:
1/4 cup strawberries (8 whole strawberries)
1 whole lemon
2 heaping tablespoons of agave nectar
water/seltzer/sparkling wine to taste

Puree the strawberries and pour into a pitcher. Add the fresh squeezed lemon juice, agave nectar, and water. Serve.

Makes 2 pint glasses.

I'll be better prepared next time I make this and maybe add some mint and possibly some champagne, prosecco, etc. as an alternative to mimosas for brunch. Also, I think I will have a cheesecloth handy to strain the strawberry seeds because they all collected at the bottom of the glass and came rushing to nail me in the face as I took my last sip. Was very tasty though. :)

Thursday, May 5, 2011

Recipe: Irish Brown Bread

Irish Brown Bread
click on photos for potentially more info on Flickr
Irish brown bread


I've never posted a recipe before, but I need to get this one down before I forget it. A few weeks ago we tried out a new Irish gastropub for lunch. My potato leek soup came with the most delicious slice of bread I've ever eaten, as well as the yummiest, richest butter I'd tasted in a long time--Kerrygold. The menu said it was "Irish brown bread," so when I got home I searched for recipes online and found this one  from 101 Cookbooks. I also discovered that you can buy Kerrygold butter at Trader Joe's (effing right!), so I immediately went out and bought both salted (for eating) and unsalted (for cooking) Kerrygold butter.

We made a few modifications to the original recipe, our version listed below, and the end result wasn't as dense as the restaurant's, but it's still very good. This is a soda bread but what makes it "brown" is apparently the whole wheat flour. I have to say, I much prefer this type to the regular kind of soda bread.  The dense, wheaty, earthy bread with salty, creamy butter really hooked me, and I almost wish it was fall/winter again so I could have a slice of this with a cup of hot soup every night.

Ingredients:
2 - 2 1/4 cups buttermilk
2 ounces Kerrygold unsalted butter
1 large egg
3 cups whole wheat bread flour
1 cup unbleached white bread flour
pinch of salt
1 teaspoon baking soda

Directions
Melt the butter over low heat or in microwave. Pour into mixing bowl and beat in the egg, slowly adding the buttermilk and incorporate the ingredients fully. In a separate bowl, sift and mix the flour, salt, and baking soda. Slowly add dry ingredients to the butter mixture while mixing on low speed.

Original author's note: "If you are using a baking tin the mixture should be on the wetter side. If your dough is too dry, mix in small splashes of buttermilk until it is the right consistency." Note: This was the case for us, and that's why we added an extra half cup of buttermilk than what the original recipe called for.

Bake at 400F for 50 minutes.

Makes 1 standard loaf; we used 3 small loaf pans so we could freeze the extra.


[Author's note: I recommend eating this bread with Kerrygold butter spread generously on it. Over the last few months I have switched to soy butter for various reasons, including the fact that the regular butter I was buying started tasting gross to me, but I have come around again to dairy butter after tasting this magical stuff.]